Visual regression testing is a good way to detect visual deviations between software releases. Screenshotting the visual output of an application along each release can be automated with a CI pipeline. The actual test logic can be done in multiple ways.
I find Python programming language very convenient for detecting differences between images. PIL Python Image Library has functions for asserting stats but this gives you just a numeric score that can be translated to a yes/no answer based on a certain threshold. However, a test result can be much more. For example an image representing the visual deviation between the two screenshots.
Here is a little script to compare images visually.
#!/usr/bin/env python3.6
from PIL import Image, ImageChops, ImageDraw
im1 = Image.open("Capture1.png")
im2 = Image.open("Capture2.png")
diff = ImageChops.difference(im2, im1)
left,upper,right,lower = diff.getbbox()
draw = ImageDraw.Draw(im1)
draw.rectangle((left,upper,right,lower), outline = "red")
im1.save('difference.png')
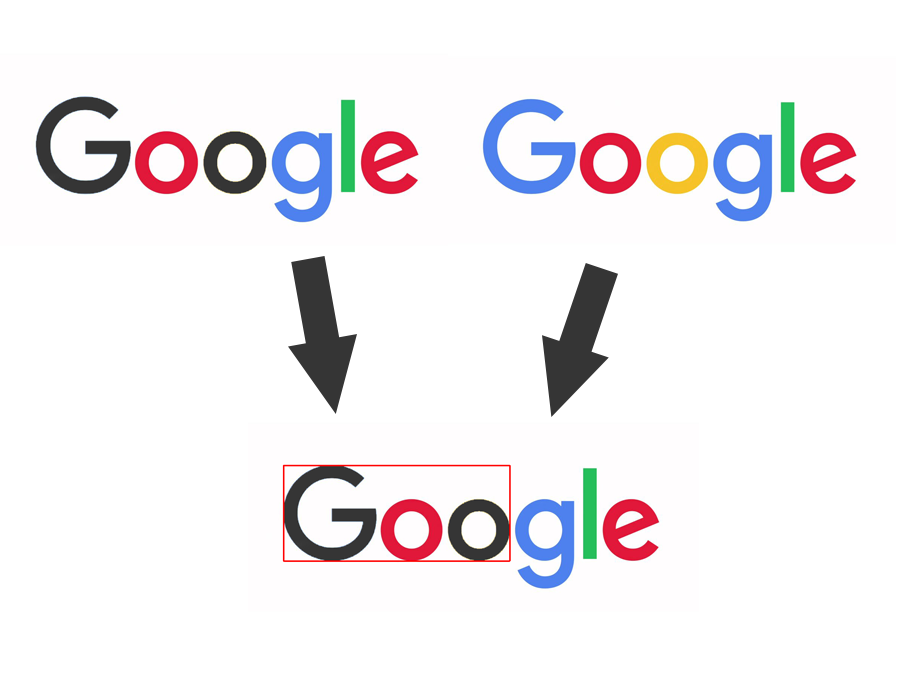
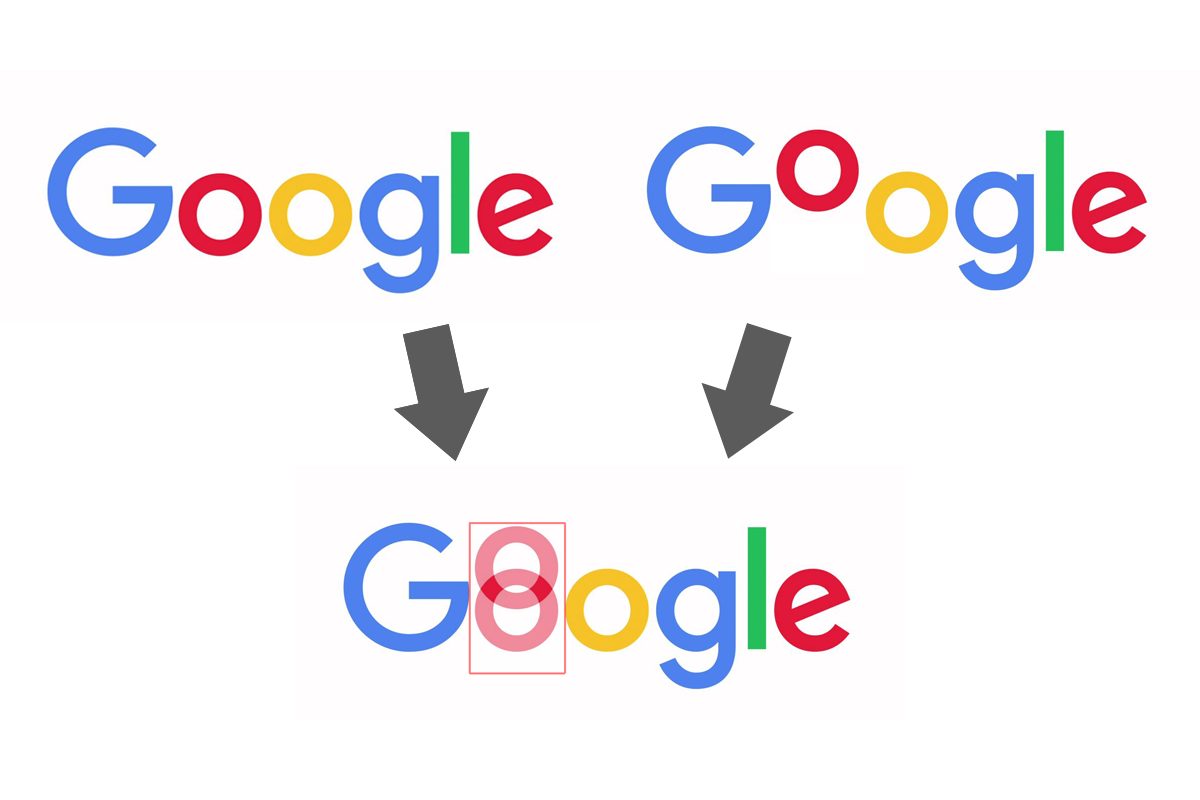
This works even better when there is only a small alignment deviation in a certain area of the screen.
#!/usr/bin/env python3.6

# Script for visual regression testing
from PIL import Image, ImageChops, ImageDraw
im2 = Image.open("Capture2.png")
im3 = Image.open("Capture3.png")

# Detect difference
diff = ImageChops.difference(im2, im3)

# Draw bounding box
left,upper,right,lower = diff.getbbox()
draw = ImageDraw.Draw(im2)
draw.rectangle((left,upper,right,lower), outline = "red")

# Overlap and blend the images
blended = Image.blend(im2, im3, alpha=0.5)
blended.save("blended.png")
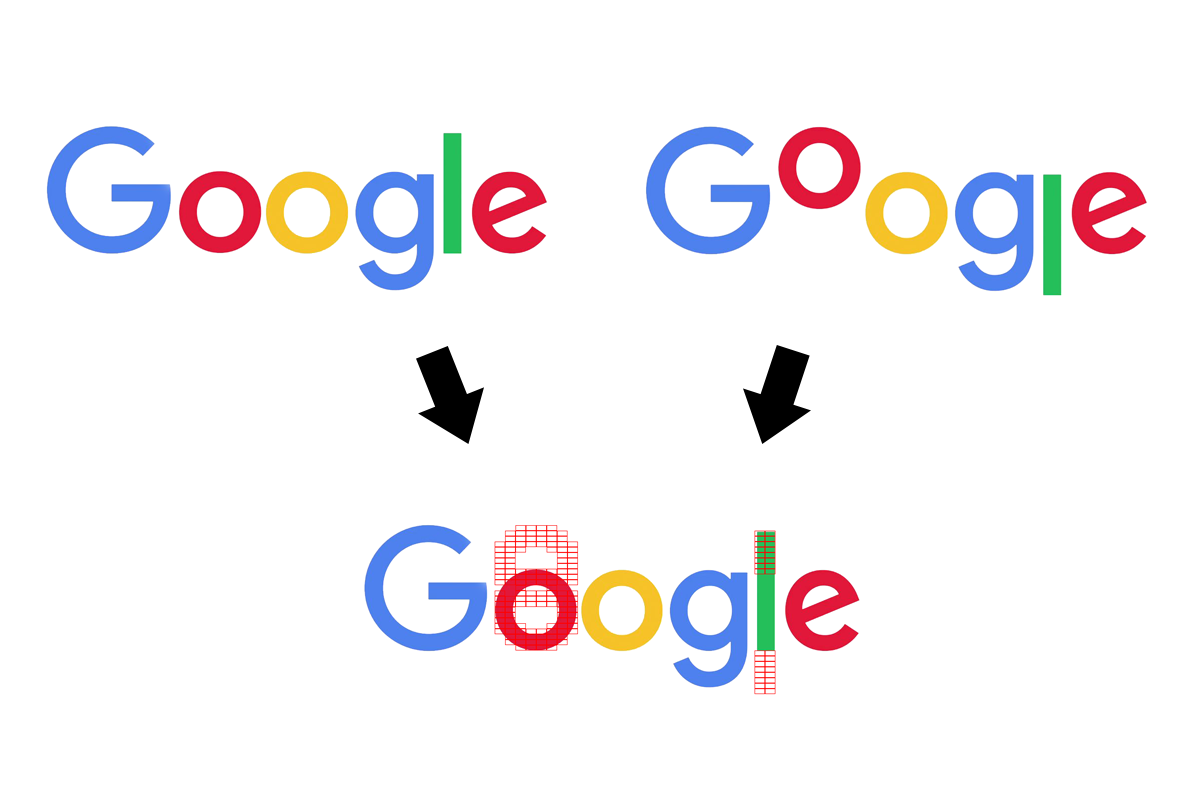
And here is a third way. This shows the areas with differences better when there are multiple differences.
#!/usr/bin/env python3.6

# Script for visual regression testing
from PIL import Image, ImageDraw

class ScreenAnalysis:

    def __init__(self):
        self.analyze()

    def analyze(self):
        capture2 = Image.open("Capture2.png")
        capture4 = Image.open("Capture4.png")
        columns = 60
        rows = 80
        screen_width, screen_height = capture2.size
        block_width = ((screen_width - 1) // columns) + 1 # this is just a division ceiling
        block_height = ((screen_height - 1) // rows) + 1
        for y in range(0, screen_height, block_height+1):
            for x in range(0, screen_width, block_width+1):
                region2 = self.process_region(capture2, x, y, block_width, block_height)
                region4 = self.process_region(capture4, x, y, block_width, block_height)
                if region2 is not None and region4 is not None and region4 != region2:
                    draw = ImageDraw.Draw(capture2)
                    draw.rectangle((x, y, x+block_width, y+block_height), outline = "red", width = 1)
        capture2.save("difference.png")

    def process_region(self, image, x, y, width, height):
        region_total = 0
        # This can be used as the sensitivity factor, the larger it is the less sensitive the comparison
        factor = 10000
        for coordinateY in range(y, y+height):
            for coordinateX in range(x, x+width):
                try:
                    pixel = image.getpixel((coordinateX, coordinateY))
                    region_total += sum(pixel)/4
                except:
                    return
        return region_total/factor

ScreenAnalysis()