In this blog post I try to describe how you can put together a scalable and cost effective website infrastructure using AWS.
We will cover the following topics:
- Enabling static website hosting in S3
- Routing traffic using Route53
- Securing a website using SSL certificate
- Reducing latency using CloudFront edge locations
There are a number of tasks that we need to handle in various AWS services in order to achieve our goal. I categorized the tasks by service.
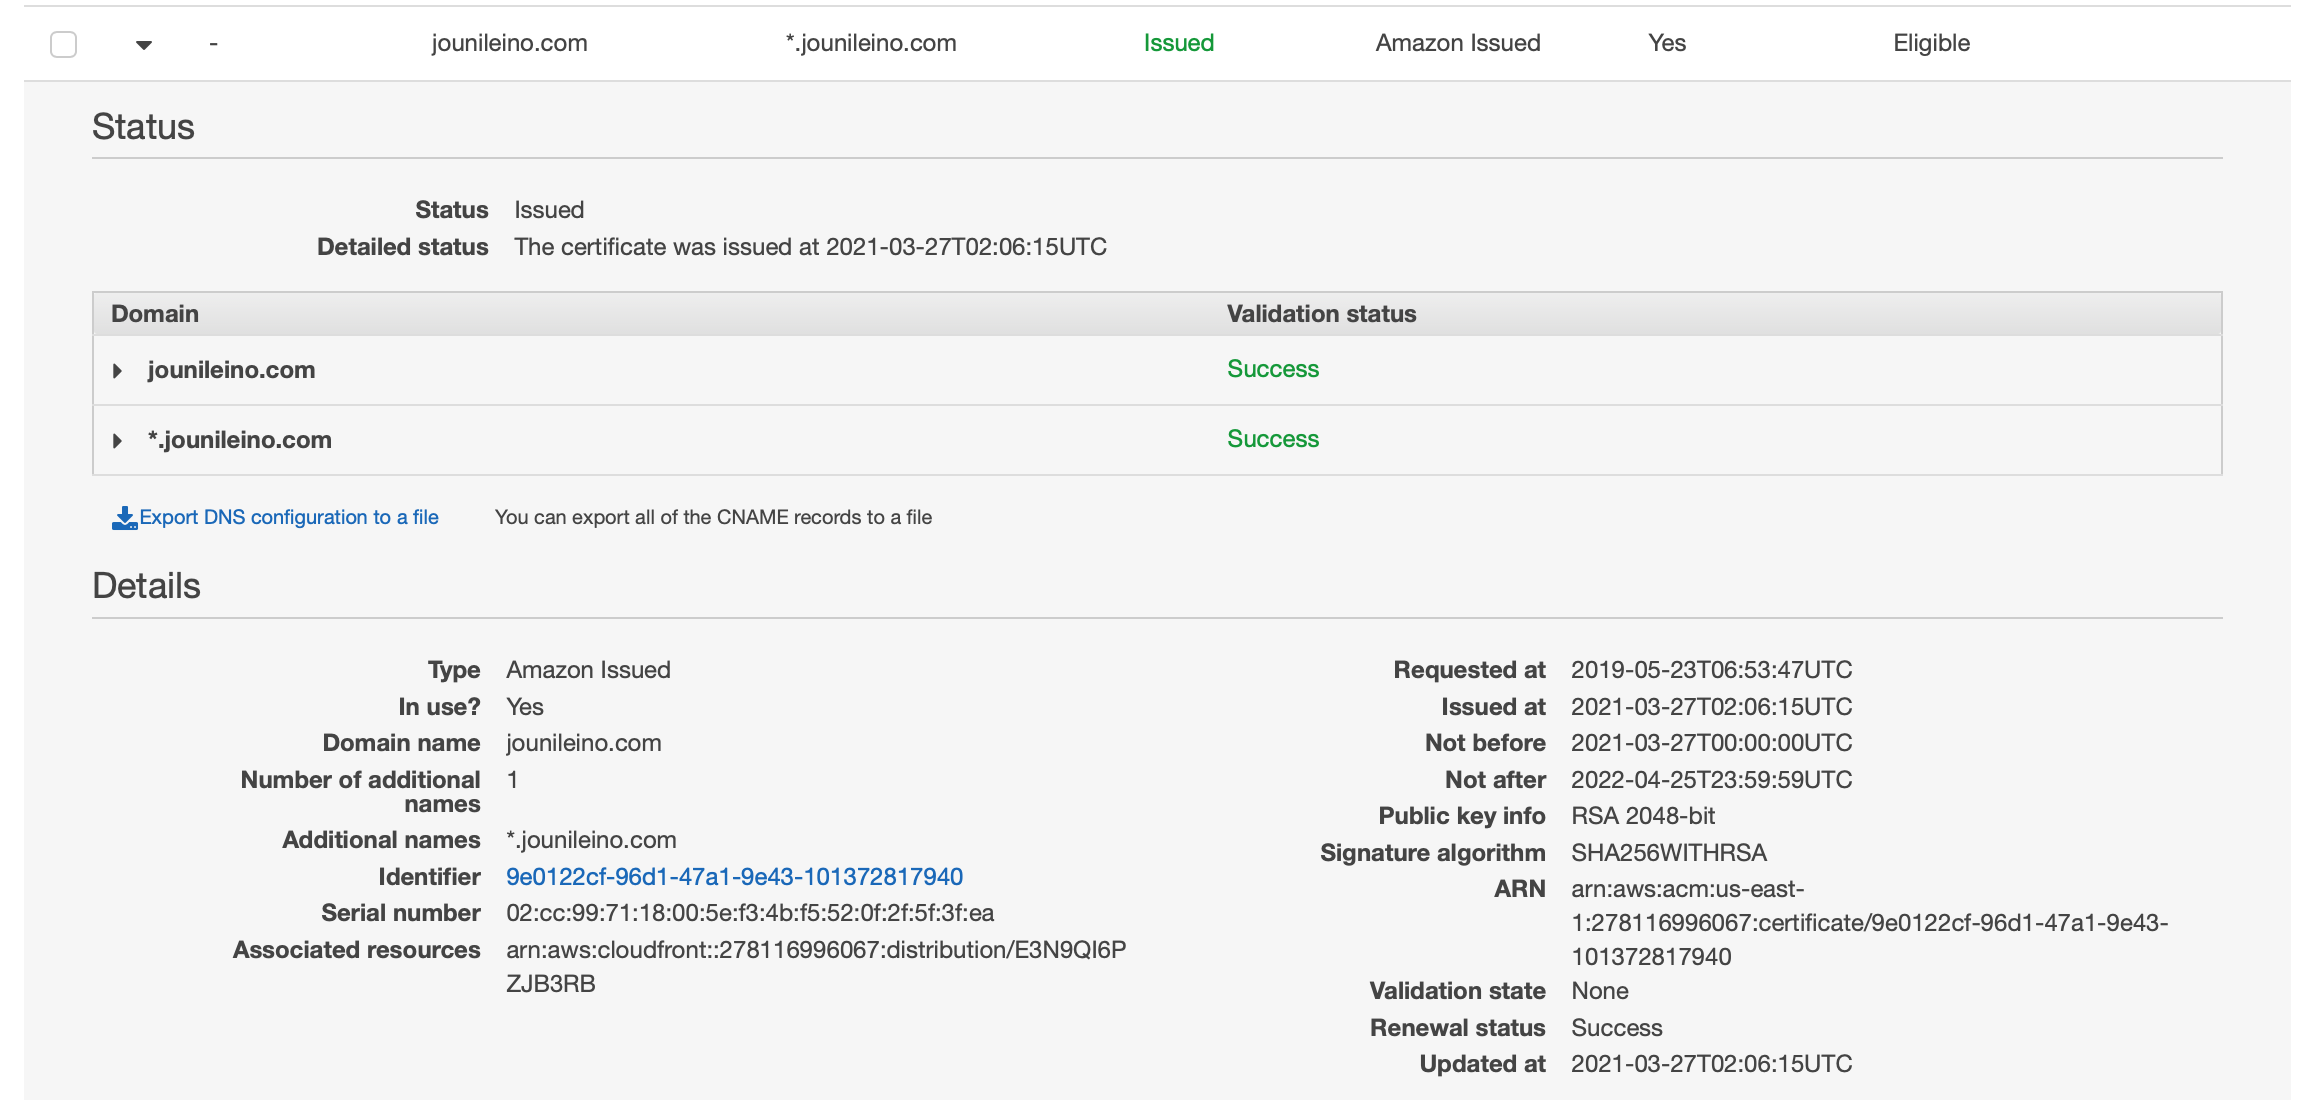
Creating SSL certificate
Request certificate -> Request a public certificate -> Add domain name
Insert yourdomain.com and additionally *.yourdomain.com
After the certificate is successfully issued you will see something like.
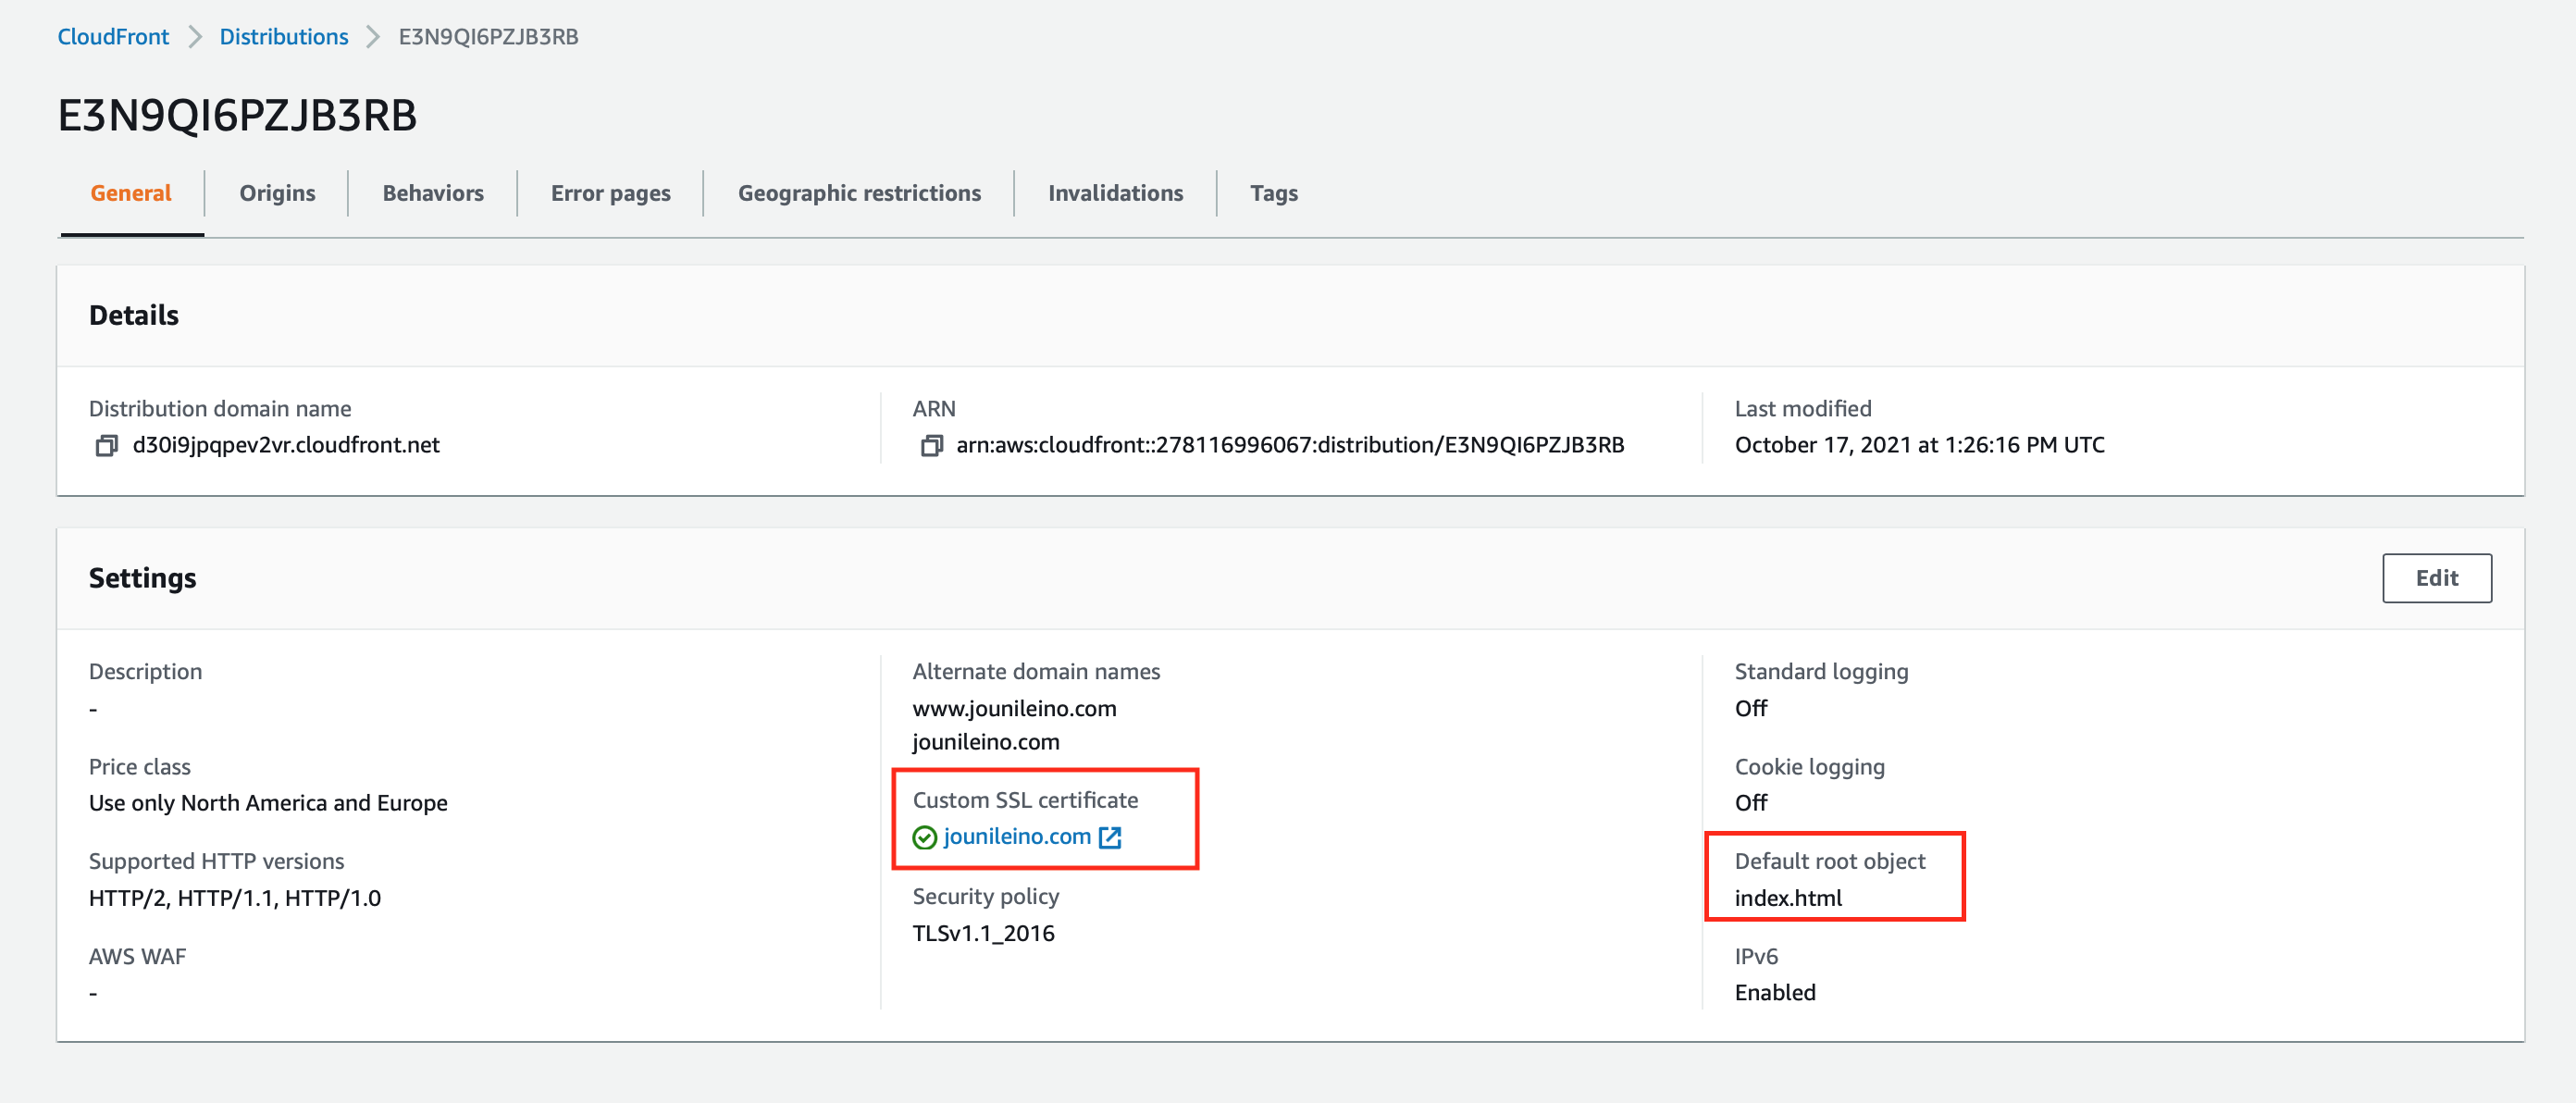
Creating a CloudFront distribution
Make sure that the SSL certificate you created in Certificate Manager is defined to be used by the Cloudfront distribution.
Also the default root object should be specified as index.html
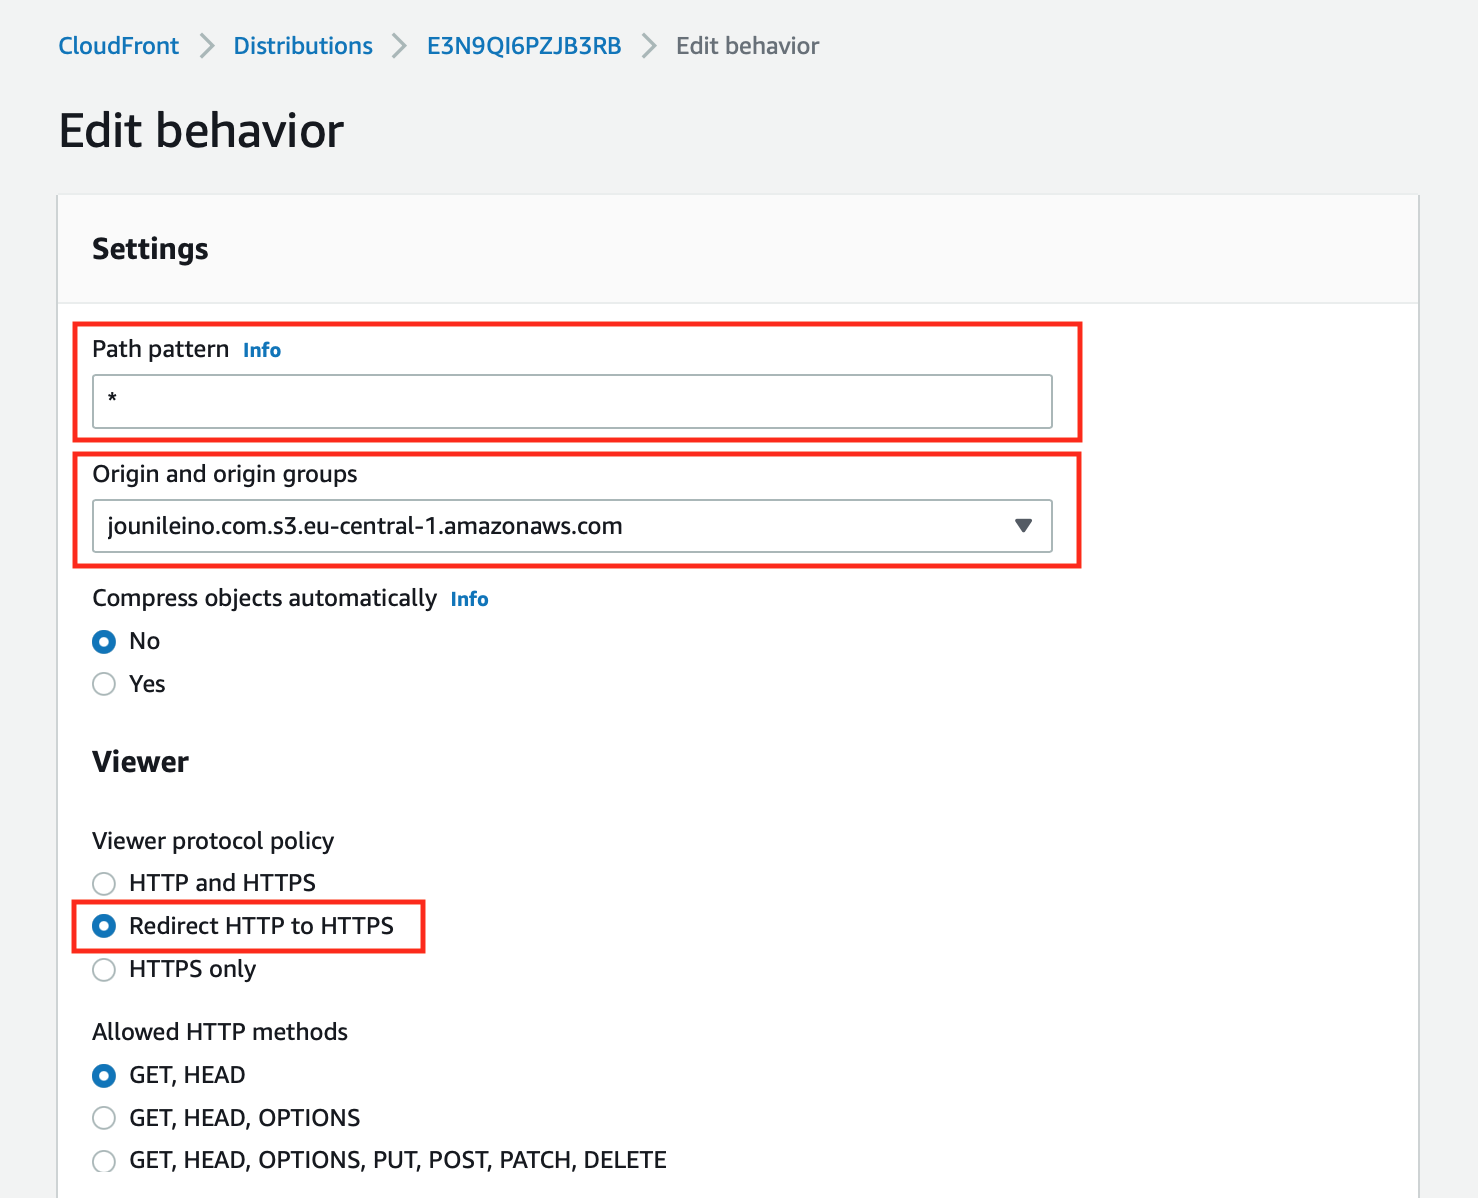
Defining an origin
Here the Origin domain field is suggesting entries but can also be manually edited.
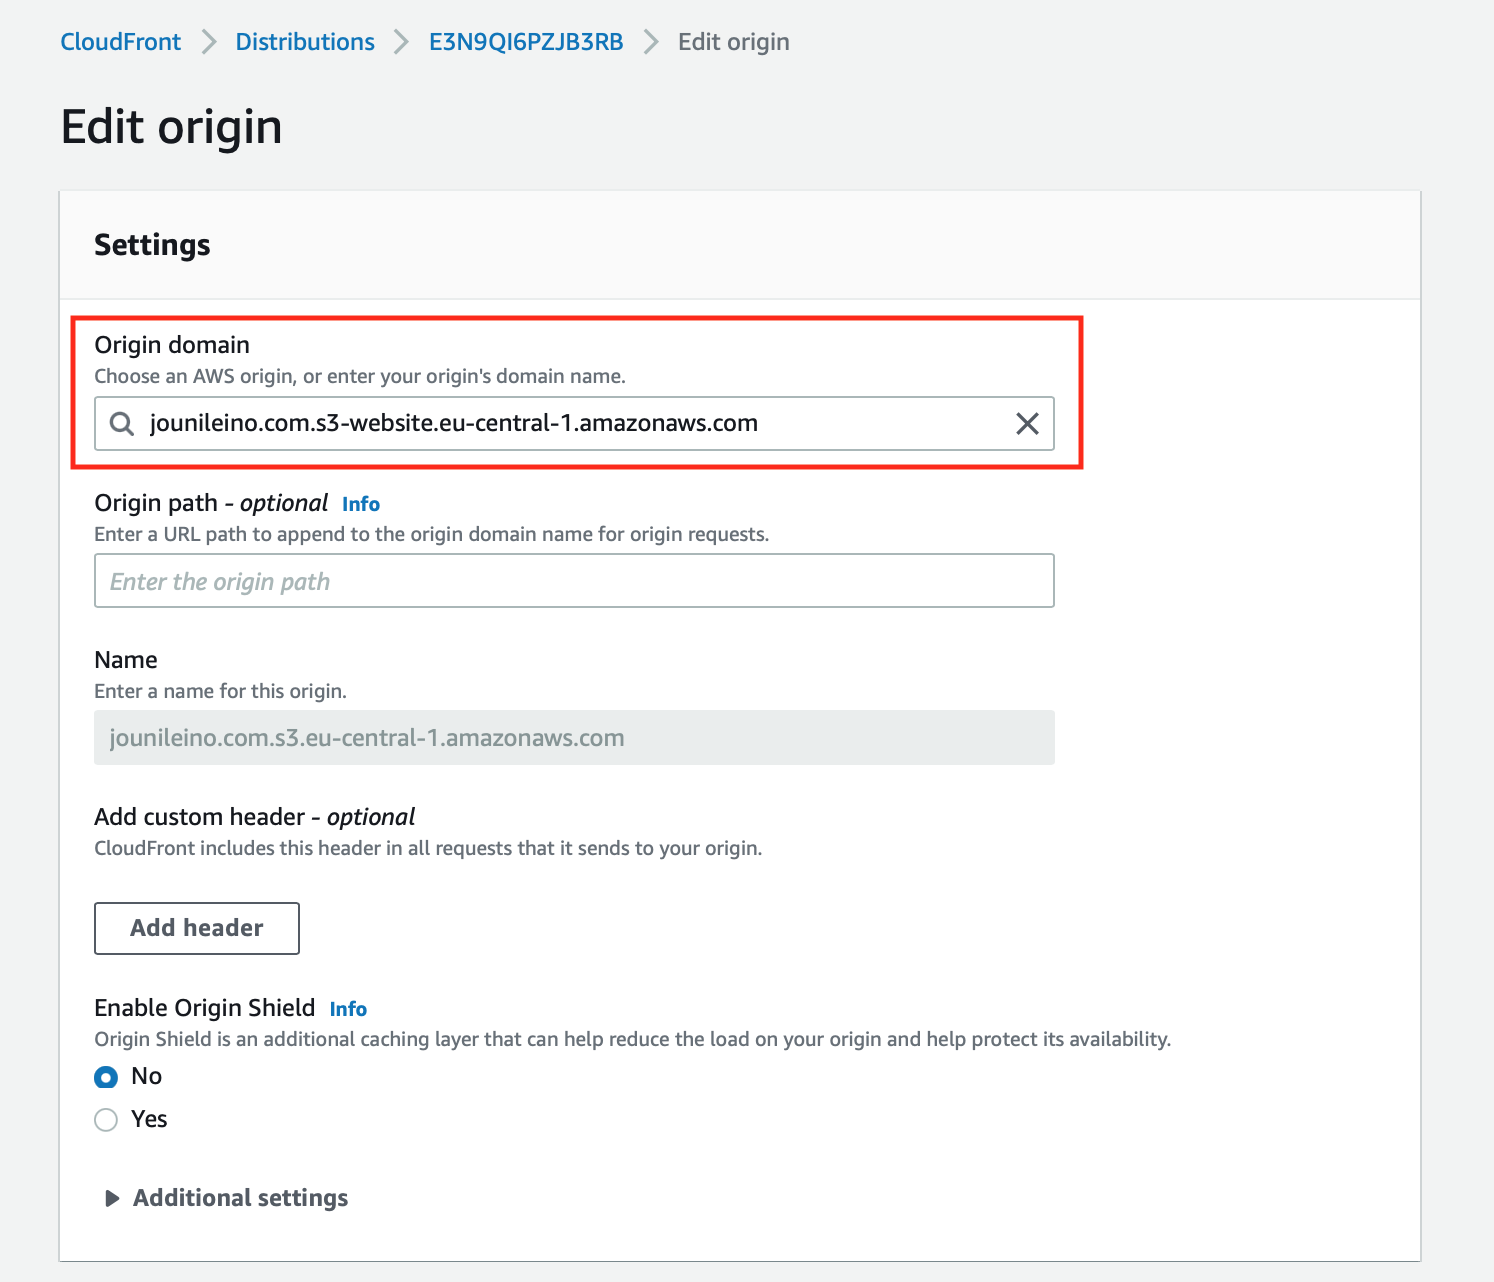
I noticed that sub-pages on the website were not displayed for some reason and I would get Access Denied when entering for exampe /contact page. This Gist provided a solution tough.
Solution:
Insert into the Origin domain field the same value as in the Static Website Hosting in S3 bucket Properties.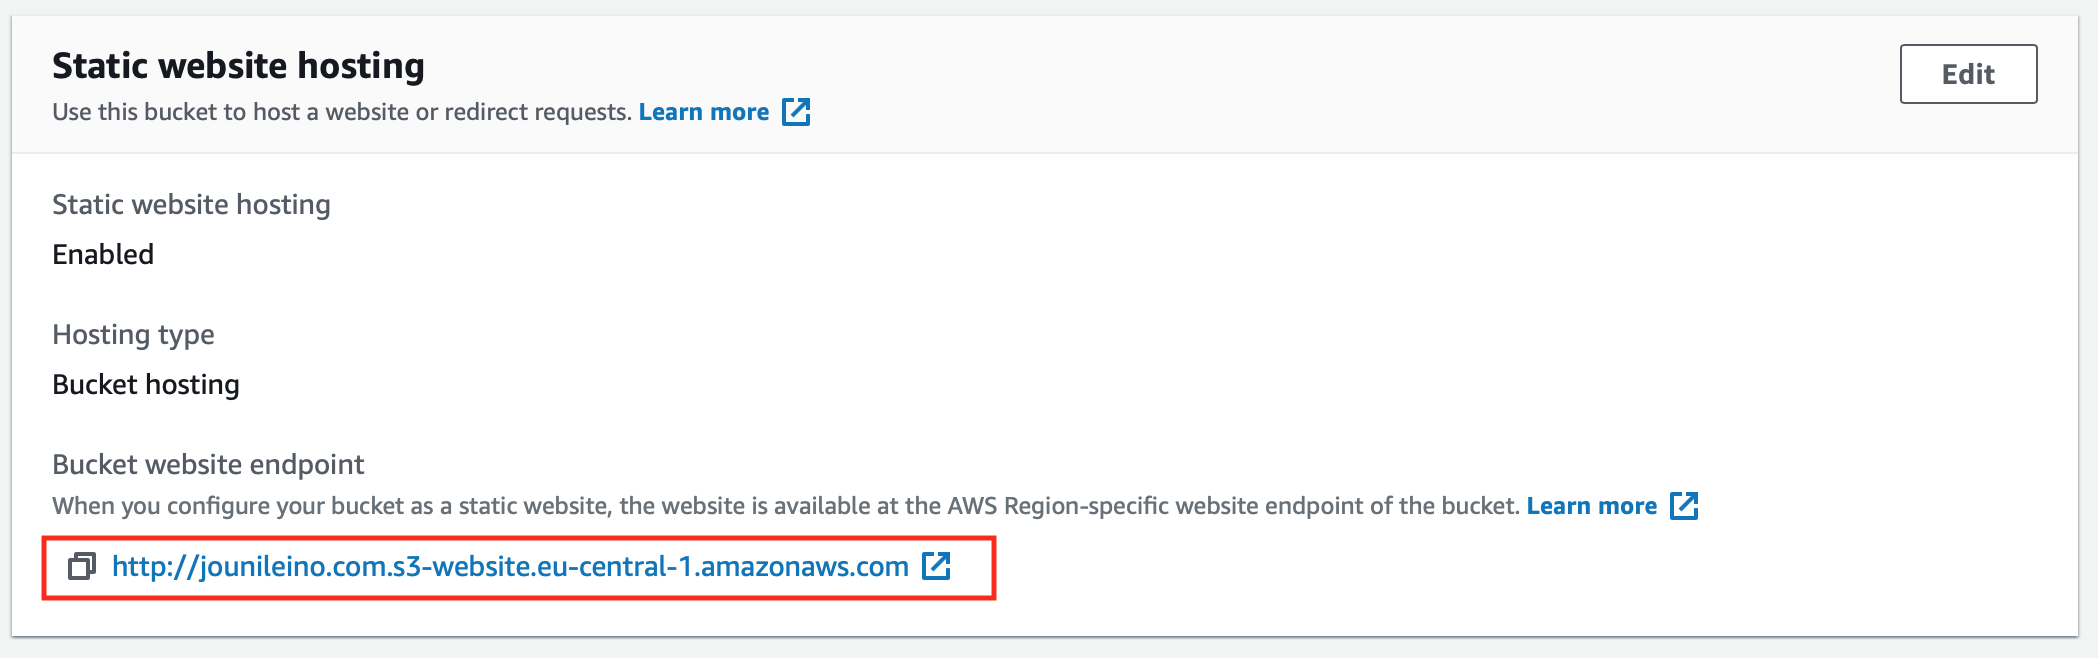
Defining a behavior
I expect you have already purchased yourdomain.com so I will skip a few steps with Route53. When you have a Domain and a Hosted zone created in Route53, your NS records should be pointing to AWS nameservers.
Now let´s configure the website specific records.
Creating A record
Point your domain to cloud front distribution.

Creating CNAME
Redirect requests from www.yourdomain.com to yourdomain.com

Creating website
For testing purposes you can just create index.html and error.html and upload those into your bucket.
Creating a S3 Bucket policy
Now let´s configure the bucket that will host our website. Insert the following into: Your bucket -> Permissions -> Bucket policy
{
    "Version": "2012-10-17",
    "Statement": [
        {
            "Sid": "Allow-Public-Access-To-Bucket",
            "Effect": "Allow",
            "Principal": "*",
            "Action": "s3:GetObject",
            "Resource": "arn:aws:s3:::yourdomain.com/*"
        }
    ]
}
Now all the pieces should be in place. This setup is cheap and requires no maintenance. The website can be updated by just simply uploading a new version of the website into the S3 bucket.
My monthly bill includes the following:
| Service | Cost |
|---|---|
| S3 | $ 0.01 |
| Cloudfront | $ 0.01 |
| Route53 | $ 1.00 |
| Route53 VAT | $ 0.19 |
| ----------- | ------------- |
| Total | $ 1.21 |